

Change nameservers and manage DNSSEC
Use this guide to move a domain between DNS providers, change its nameservers, or manage DNSSEC keys.
Choose your task
- Move from Domain Chief to custom nameservers
- Move back to Domain Chief nameservers
- Add or replace DNSSEC keys
- Create a nameserver template
- Fix a nameserver or DNSSEC problem
Before changing nameservers
Leave 24 hours between DNSSEC and provider changes
Enabling or disabling DNSSEC can take up to 24 hours. If the nameservers or DNSSEC keys will change, disable DNSSEC and wait at least 24 hours after the change completes before changing nameservers. Once the new provider is answering correctly, enable DNSSEC with its keys. A key mismatch can make the entire domain appear unavailable even when its DNS records are correct.
- Make a complete copy of the current DNS zone. If Domain Chief hosts it, use Manage DNS records and select Export.
- Create the same records at the new provider, including website, mail, verification, and service records.
- Ask the new provider for the exact nameserver hostnames.
- Check whether the domain currently uses DNSSEC and whether the new provider supports it.
- If DNSSEC is enabled and the provider or keys will change, disable it and wait at least 24 hours before changing nameservers.
- If possible, lower the TTLs before the move and wait for the previous TTL to expire.
Do not remove the old zone immediately. Keep it available until the new nameservers are authoritative and the domain works from several networks.
Move from Domain Chief to custom nameservers
- Set up and verify the zone at the new DNS provider.
- In the domain's DNS section, select Manage nameservers.
- Select Use custom nameservers. Domain Chief disables hosted-DNS management and removes its managed DNSSEC keys, but leaves the Domain Chief nameservers and existing hosted zone in place. Custom nameservers saved as the team default are not applied.
- Wait for the pending change to complete. If DNSSEC was enabled, wait at least another 24 hours before changing the nameservers.
- Select the pencil button beside the current nameservers.
- Replace them with the hostnames supplied by the new provider. You can use From template when the team already has a matching nameserver template.
- Select Save.
- Wait until the nameserver change has completed and the new provider is answering correctly.
- If the new provider uses DNSSEC, open Manage DNSSEC, add its key type, algorithm, and public key, then select Save keys. Allow up to 24 hours for DNSSEC to become active.
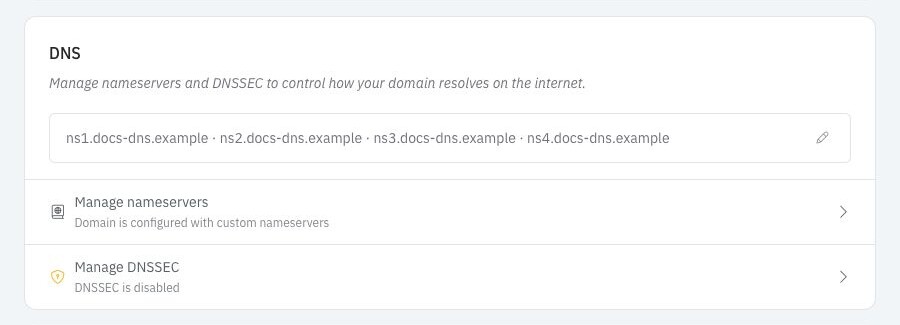
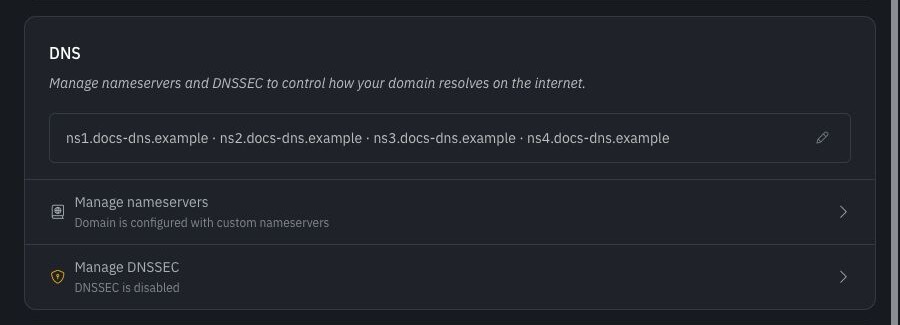
domainchief-lqyorkeb.example and its nameservers are reserved demonstration names.
What happens next
Nameserver and DNSSEC changes are processed in order. A pending notice means Domain Chief has accepted the change but the registry has not completed it yet. Avoid submitting conflicting changes while one is pending.
Move back to Domain Chief nameservers
- Export the complete zone from the current DNS provider.
- If DNSSEC is enabled, open Manage DNSSEC, remove every key, and select Save keys. Wait for the change to complete, then wait at least 24 hours before changing nameservers.
- In the domain's DNS section, select Manage nameservers.
- Select Use Domain Chief nameservers.
- Open Manage DNS records and recreate or import the required records as soon as the hosted zone is available.
- Check the website, incoming and outgoing email, and any verification records.
What happens next
Domain Chief manages DNSSEC when its nameservers are in use. You do not need to enter keys yourself, but enabling DNSSEC can take up to 24 hours. If the domain cannot tolerate any interruption, contact support before moving it because the app cannot pre-stage a new Domain Chief zone while custom nameservers are active.
For record formats and zone tools, see Manage DNS records.
Add or replace DNSSEC keys
Only manage keys in Domain Chief when the domain uses custom nameservers.
- Ask the DNS provider for its DNSSEC key details. The values must include the key type, algorithm, and public key shown in Domain Chief.
- Open the domain and select Manage DNSSEC.
- Select Add key and enter the supplied values.
- Add every active key required by the provider.
- Select Save keys.
What happens next
Removing every key disables DNSSEC at the registry. During a planned key rotation, follow the DNS provider's instructions about when to add the new key and remove the old one. Do not guess the order.
Enabling or disabling DNSSEC can take up to 24 hours. If the provider gives you only a DS digest instead of the fields shown in Domain Chief, ask it for the DNSKEY values or contact support.
If the domain uses Cloudflare nameservers, see Connect Cloudflare for DNSSEC to retrieve its key instead of entering it manually.
Nameserver reference
Where DNS settings are managed
| Setup | Where you manage records | Where you manage DNSSEC |
|---|---|---|
| Domain Chief nameservers | In Manage DNS records | Domain Chief manages it for you |
| Custom nameservers | At the provider named by those nameservers | Add the provider's DNSSEC keys in Domain Chief |
Use custom nameservers when another provider hosts the DNS zone. Changing nameservers does not copy records from one provider to the other.
Use nameserver templates
Templates save sets of nameservers that your team uses regularly.
- Open Settings.
- In Nameserver Templates, select New template.
- Give the template a clear provider or purpose name.
- Enter at least two nameserver hostnames and select Save.
You can then select From template while editing a domain's nameservers or choosing nameservers during a registration or transfer. Editing a template does not change existing domains.
The separate Nameservers setting controls the team's default for new registrations and transfers. It also does not rewrite existing domains.
When glue records are required
Glue records are IP addresses registered for nameservers that are children of the same domain. For example, ns1.example.com needs glue when it is used as a nameserver for example.com.
When Domain Chief detects this situation, the nameserver editor asks for IPv4 or IPv6 addresses. Enter the authoritative server addresses supplied by the DNS operator. Ordinary provider nameservers such as ns1.provider.example do not need glue from your domain.
Troubleshooting
Why did the website or email stop working?
Check that the new provider has every record from the old zone and that the saved nameserver hostnames are correct. Use the Chief Tools DNS checker to check the nameservers and public DNS answers. The lookup button beside the domain heading opens it with the domain already filled in. Restore the previous nameservers if the new zone is incomplete and the registry still allows another update.
Why does the domain fail only for DNSSEC-validating users?
The registry key and the provider's active key probably do not match. Check the domain with the Chief Tools DNS checker, then compare the key type, algorithm, and public key with the provider's current values. If you are unsure, contact the DNS provider or Domain Chief support before removing keys.
Why did the registry reject a nameserver?
Check for spelling mistakes and duplicate hostnames. If the nameserver belongs to the domain itself, add the required glue IP addresses. Some registries also impose minimum or maximum nameserver counts.
Why is a change still pending?
Wait for the pending operation to finish before trying a different configuration. Registry processing and DNS caching are separate: the app may show a completed update while recursive resolvers still use cached answers.