# Manage registrant contacts and WHOIS privacy
import {BrowserWindow, Callout, Head} from "zudoku/components";
Manage registrant contacts and WHOIS privacy | Domain Chief
Use this guide to create domain contacts, change a domain's registrant information, manage WHOIS privacy, or complete contact verification.
## Choose your task
- [Create a contact](#create-a-contact)
- [Change the contact on a domain](#change-the-contact-on-a-domain)
- [Enable or disable WHOIS privacy](#enable-or-disable-privacy-for-one-domain)
- [Complete contact verification](#complete-contact-verification)
- [Set the team's default contact](#set-the-teams-default-contact)
- [Fix a contact or privacy problem](#troubleshooting)
Registries can verify the name, address, phone number, email address, and company details you provide. Incorrect or outdated information can delay a registration or transfer and may lead to suspension or deletion.
## Create and maintain contacts
### Create a contact
1. Open **Contacts**.
2. Select **New contact**.
3. Choose the contact's country.
4. For a company, enter its legal company name and any registration or VAT number the form requests.
5. Enter the responsible person's name, email address, phone number, and postal address.
6. Select **Save**.
The company name is optional only when the registrant is an individual. If a company owns the domain, enter its legal name rather than putting the business name in the person's name fields.
Some TLDs require extra information. For example, the contact editor includes dedicated data for `.fi` and `.us`, and some personal registrations require an identifier or birth date. Add these values only when the TLD's requirements or the form asks for them.
### Set the team's default contact
On the **Contacts** page, select the star beside the contact your team uses most often. The filled star marks the default.
Domain Chief uses this contact when a new registration or transfer needs contact information. While editing contacts on an existing domain, **Fill from default** selects it for every compatible contact role.
Changing the default does not update existing domains. Edit those domains separately when their registry contact must change.
### Edit or copy a contact
Open **Contacts** and select **Edit** beside the contact. You can keep its email address, phone number, postal address, registration details, and supported TLD data up to date.
A saved contact's person name, legal company name, and country are fixed because changing them can mean changing the legal registrant. Create a new contact when one of those identities changes. The copy button beside an existing contact is a quick way to reuse the address and other details before correcting the new identity.
The domain count beside a contact opens the domains that currently use it. A contact cannot be deleted while it is still required by a domain or another contact.
## Change the contact on a domain
1. Create or update the required contact under **Contacts** first.
2. Open **Domains** and select the domain.
3. Find **Registrant Information** or **Contact Information**.
4. Select the pencil button beside the current contact.
5. Choose a contact for each role shown by the TLD. The down-arrow buttons can copy one selection into the next compatible role.
6. Select **Save**.
Some registries treat a change of registrant as a separate trade operation. When that applies, Domain Chief keeps the owner field locked and tells you to contact support. You can still correct the details on the attached contact if the legal registrant itself is not changing.
### After saving the change
Contact changes can remain pending while the registry processes them. If a change fails, the previously confirmed contacts remain active and the domain page explains what to correct.
## Manage WHOIS privacy
### Enable or disable privacy for one domain
Open the domain and use **Enable** or **Disable** in its contact section. Read and confirm the warning before the change is sent to the registry.
When you disable privacy, Domain Chief applies the team's default contact. Check that the default is correct first, then edit the domain if it needs another contact. Disabling privacy shares that selected contact with the registry.
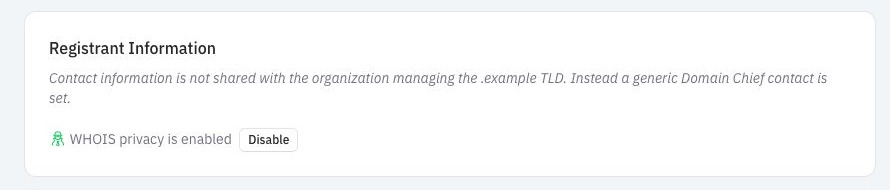
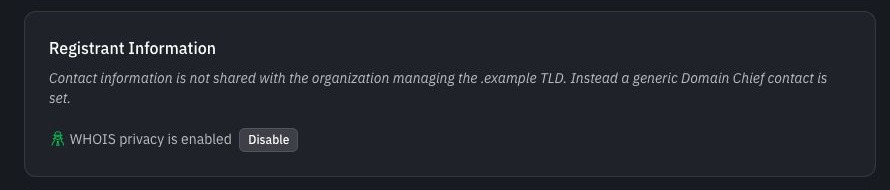 The screenshot uses a reserved `.example` domain and synthetic settings.
### Set the team's privacy default
To choose the default for future registrations and transfers, open **Settings** and use the **WHOIS Privacy** section. This team default does not change existing domains.
### Understand WHOIS privacy
WHOIS privacy is available only for TLDs that support Domain Chief's privacy contact.
| State | Information sent to the registry |
| --- | --- |
| Privacy supported and enabled | Generic Domain Chief contact information replaces your team's contact. |
| Privacy supported but disabled | The contact selected for the domain is sent. |
| Privacy not supported | The selected contact is sent; the registry controls what it publishes or redacts. |
Enabling privacy does not change who owns the domain. It changes the contact details shared with the registry and shown in public WHOIS or RDAP data.
For TLDs without this privacy option, registries generally redact personal contact data from public results. Company or organization details may still be public, and the registry still receives the underlying contact information.
## Complete contact verification
Some TLDs require the registrant's email address to be verified. Domain Chief sends a verification email when it is needed and shows **Contact Verification Required** on the affected domain.
1. Open the verification email sent to the contact's email address.
2. Follow its verification link.
3. Return to Domain Chief and wait for the status to update.
### If verification is still pending
If the email does not arrive, check the address on the contact and look in the spam folder. Allow at least five minutes before using **Resend Email**. A domain notice may instead provide **Verify Contact** when the registry hosts the verification page.
Use the action shown in the domain notice to start or resume the appropriate verification flow. A **Verification pending** badge on the Contacts page means the process has not finished.
## Troubleshooting
### Why can't I select a contact?
The contact may not meet that TLD's country, company, verification, or role requirements. Open it from **Contacts**, complete the fields requested by the validation message, and try again.
### Why is the owner field locked?
The registry requires a trade to change the registrant. Contact support or update the non-identity details on the contact already attached to the domain.
### Why can't I enable privacy?
The TLD does not support Domain Chief's privacy contact, the domain state does not allow an update, or another registry operation is pending. Read the text in the contact section; it explains the TLD's public-data behavior when privacy is unavailable.
### Why did the verification email go to the wrong address?
Correct the contact's email address first, then resend verification from the domain notice or contact verification page. Do not create repeated verification requests while the old address is still saved.
The screenshot uses a reserved `.example` domain and synthetic settings.
### Set the team's privacy default
To choose the default for future registrations and transfers, open **Settings** and use the **WHOIS Privacy** section. This team default does not change existing domains.
### Understand WHOIS privacy
WHOIS privacy is available only for TLDs that support Domain Chief's privacy contact.
| State | Information sent to the registry |
| --- | --- |
| Privacy supported and enabled | Generic Domain Chief contact information replaces your team's contact. |
| Privacy supported but disabled | The contact selected for the domain is sent. |
| Privacy not supported | The selected contact is sent; the registry controls what it publishes or redacts. |
Enabling privacy does not change who owns the domain. It changes the contact details shared with the registry and shown in public WHOIS or RDAP data.
For TLDs without this privacy option, registries generally redact personal contact data from public results. Company or organization details may still be public, and the registry still receives the underlying contact information.
## Complete contact verification
Some TLDs require the registrant's email address to be verified. Domain Chief sends a verification email when it is needed and shows **Contact Verification Required** on the affected domain.
1. Open the verification email sent to the contact's email address.
2. Follow its verification link.
3. Return to Domain Chief and wait for the status to update.
### If verification is still pending
If the email does not arrive, check the address on the contact and look in the spam folder. Allow at least five minutes before using **Resend Email**. A domain notice may instead provide **Verify Contact** when the registry hosts the verification page.
Use the action shown in the domain notice to start or resume the appropriate verification flow. A **Verification pending** badge on the Contacts page means the process has not finished.
## Troubleshooting
### Why can't I select a contact?
The contact may not meet that TLD's country, company, verification, or role requirements. Open it from **Contacts**, complete the fields requested by the validation message, and try again.
### Why is the owner field locked?
The registry requires a trade to change the registrant. Contact support or update the non-identity details on the contact already attached to the domain.
### Why can't I enable privacy?
The TLD does not support Domain Chief's privacy contact, the domain state does not allow an update, or another registry operation is pending. Read the text in the contact section; it explains the TLD's public-data behavior when privacy is unavailable.
### Why did the verification email go to the wrong address?
Correct the contact's email address first, then resend verification from the domain notice or contact verification page. Do not create repeated verification requests while the old address is still saved.